You can also copy paste and blend weights between vertices. Bind the skin to the skeleton with a smooth bind.

Solved Painting Skin Weight Tips Autodesk Community Maya
Some of these might be super obvious but Im betting at least one or two of them probably are not.
. Painting skin weight tips I have been trying my hand at rigging this female model for a couple weeks now but I do not seem to be getting too far with the process. The Paint Skin Weights Tool is one of the Artisan-based tools in Maya. If its wireframe you wont be able to see the.
With the Paint Skin Weights Tool you can paint weight intensity values on the current smooth skin. Do a rough block-out for the major sections upper torso lower torso upper leg lower leg etc test it out then. In Maya you can set the joint display to have joints look like something.
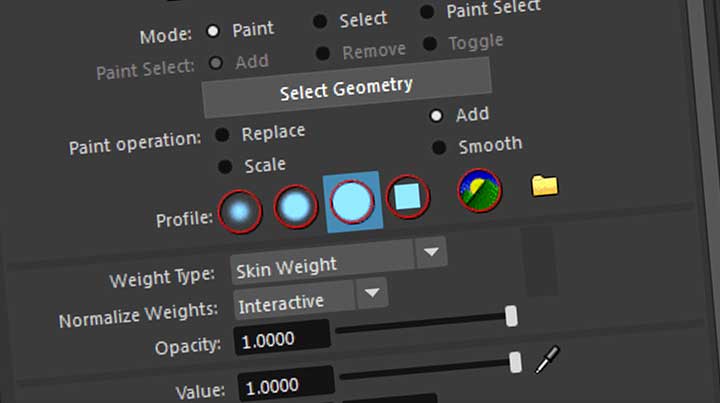
Initially I was going to use the trans-pose tool in Zbrush but after having a few test. Painting Weights - Tips-Avoid using Substitute stick with ReplaceAddSmooth on the Paint Weight Brush options. Right-clicking on a joint and using a Marking menu to select the paint weight option is typically faster than trying to find the same joint in the Paint Weight Joint list.
MAXSkinWeightTool v 11 for Maya This is a MEL script similar to the weight tool in 3DSMAX. Ive looked up several tutorials for painting skin weights but Im still missing something. Know what your.
Substitute can oddly disperse weights between joints. A model can be skinned using this script without using the maya paint tool. Substitute can oddly disperse weights between joints.
Using simple proxy geometry to achieve very smooth weights interpolation. I find theres always a spot that i cant erase not sure why. Tips for maya weight painting.
Duplicate the geometry to get maya default bind on different parts. The problem comes when you. Shop by department purchase cars fashion apparel collectibles sporting goods cameras baby items and.
Search for jobs related to Maya weight painting tips or hire on the worlds largest freelancing marketplace with 19m jobs. Posing rinnging and weight painting in Maya 7. Today were going to follow though a whole characters skinning process.
Weight Painting Tips Only mirror weights when the model is in bind pose or at least in a symmetrical pose as the current vertex positions are used. Post normalize is a hidden process that at playback forces the weights down to a 0-1 space while allowing an additive weight approach that makes for very difficult management of weights with the existing tools in Maya and was developed for using the capsules to weight with not really painting weights. Its me again im learning weight painting and im struggling a bit.
Also any times for rigging eyes attaching them to the head please let me know. This one comes in very handy when we are dealing with. Some tips for painting skin weights in Maya Contents.
Using simple proxy geometry to achieve very smooth weights interpolation quickly. This can be an issue to weight. See the following topics for more information on working with the Paint Skin Weights Tool.
OK so why am I using Maya 7 I hear you scream. Its free to sign up and bid on jobs. Simplifying geometries with thickness and copying the weights.
A typical workflow in painting weights the key task in skinning is selecting the geometry switch to paint skin weights tool select the corresponding joint in the weight manager and then begin painting. Gio Coutinho Rooster Teeths Rigging Artist shows you how to create better rigs with simple skinning tips in MayaSee more Rooster Teeth x Maya Tutorials. From ROM Animation Painting Weights Selection Tips Flooding and general examples of.
When using the newer and preferred method Normalize Weights Post the weight you take away from a vertex does not automatically get assigned to other vertices as the sum of all weights no longer needs to equal one. This is important for two. Maya Weight Painting Tips Texturing Stylish Cartoon Character In Maya Photoshop Video Tutorial Cg Elves.
Use Post as normalization method when smoothing. In the Animation menu set select Skin Paint Skin Weights Tool. This script provides tools to select vertices and assign them weights.
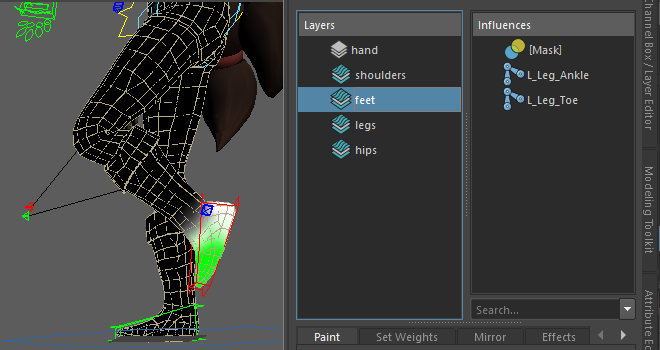
Vasils tips include. The Rigging Dojo posts a quick tip that can make all that a little easier. Lock down everything youre not working on.
Copy and paste vertex weights. Key a range-of-motion cycle on the skeleton to scrub through while youre working. Joint-based face rigs can look really cluttered with all the joints that need to be there.
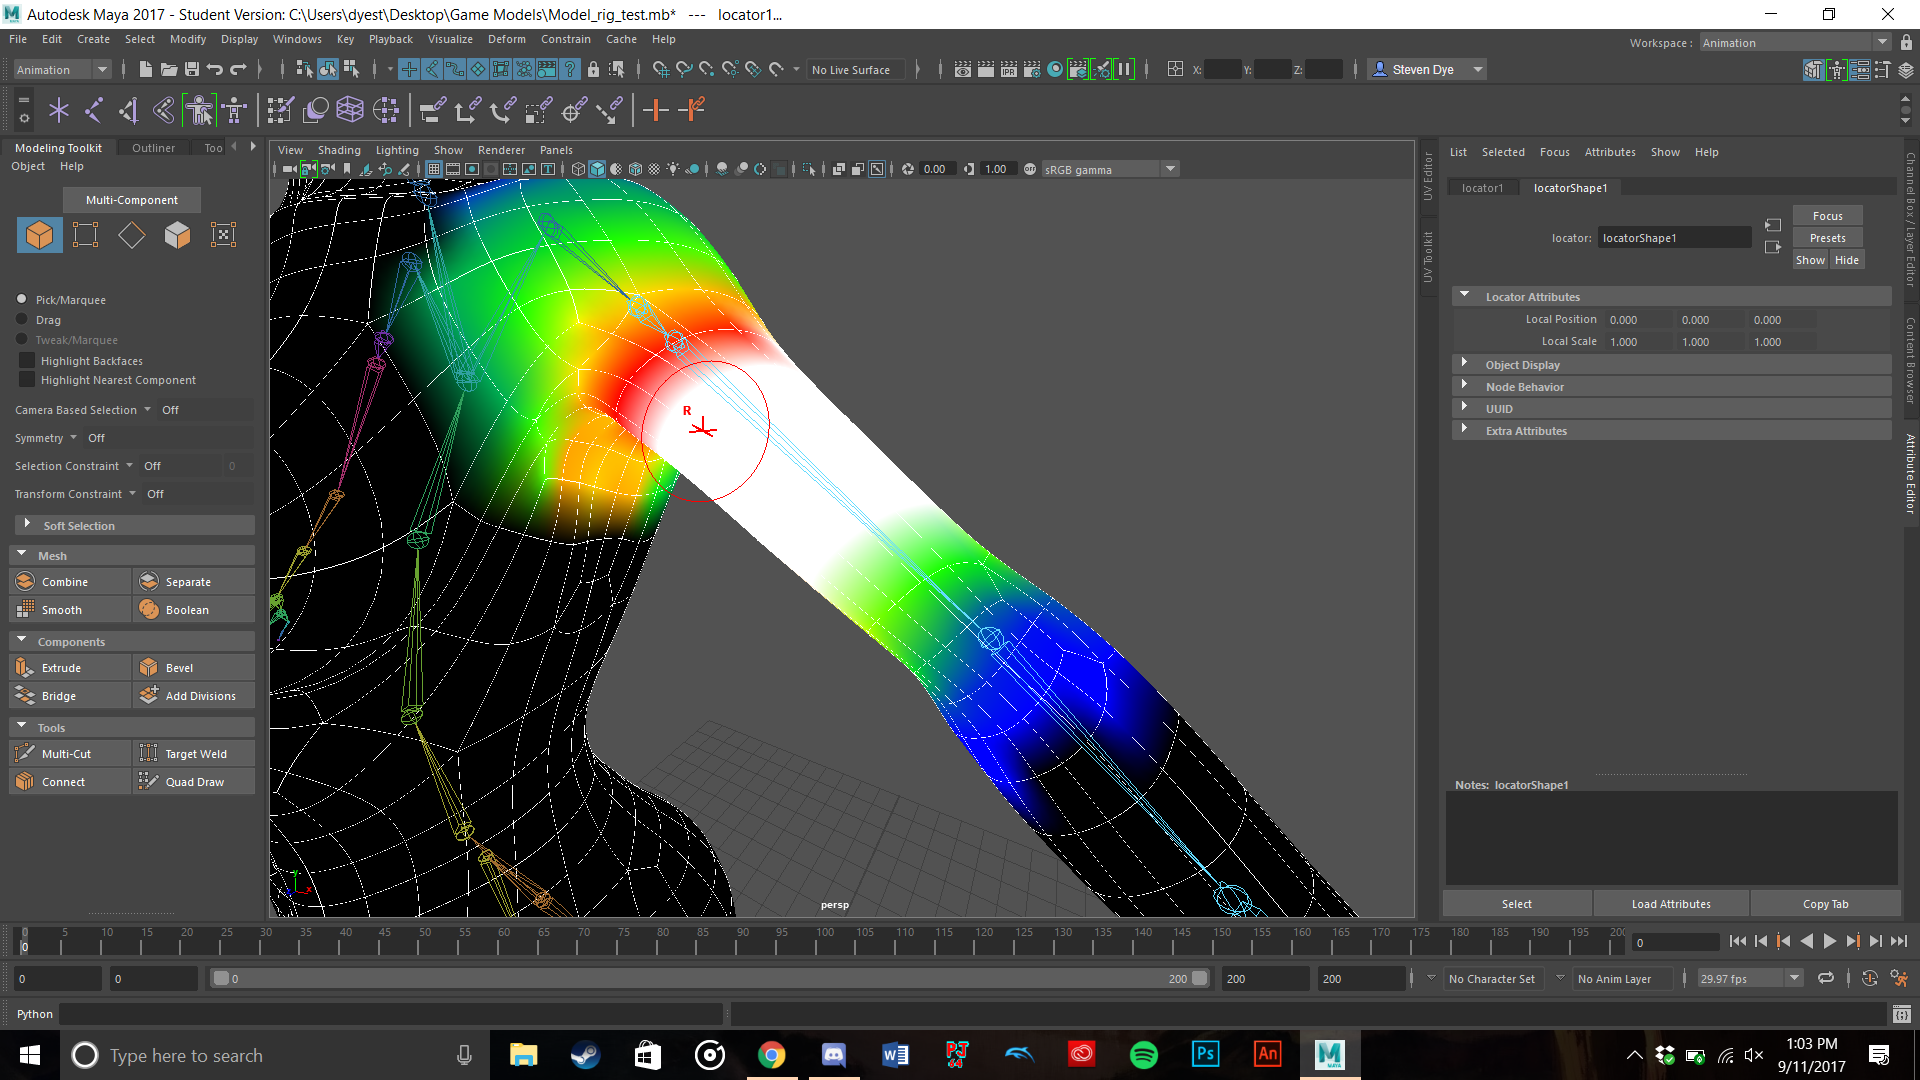
Move skinned joints tool. Heres my little collection of tips. Make sure your viewport is set to smooth shading or flat shading.
Tips for maya weight painting. Simplifying geometries with thickness and copying the weights. So with that out of the way let us get on with it.
Stick with ReplaceAddSmooth on the Paint Weight Brush options. Painting Weights - Tips. -Right clicking on joint and using a marking menu to select the paint weight option is typically faster than trying to find the same joint in the paint weight joint list.
Posted by 1 year ago. This can make it difficult to know what is what and what you are painting. Use the Marking Menu.
Well Mostly for convenience the computer I use in the 3D studio the only one with Zbrush only had Maya 7 so I thought Id just roll with that edition.

10 Painting Weights In Maya Ideas Maya Painting Character Rigging

Maya Painting Skin Weights Youtube

Maya 2017 Weight Painting Tutorial Youtube

Painting Weights Maya Tutorial Youtube
Solved Painting Skin Weight Tips Autodesk Community Maya
Blue Zoo Rigger Shares 11 Tips For Painting Weights In Maya Lesterbanks
Ngskintools Com

Some Tips For Painting Skin Weights In Maya Bindpose
0 comments
Post a Comment